 Read this article in English (AI translated)
In diesem Artikel erfahren Sie alles über die Nutzung von Komfortkasse mit PrestaShop.
Lesen Sie zuvor den Artikel Erste Schritte: Einrichtung und Verbindung zum Shop.
Installation des Komfortkasse Moduls für PrestaShop
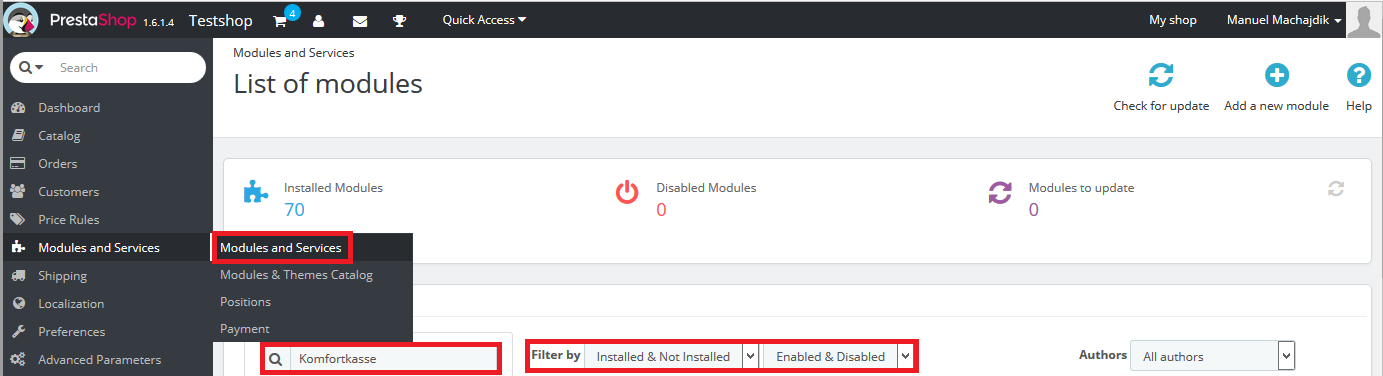
In PrestaShop Back Office, go to Modules and Services.
Make sure you filter by Installed & Not Installed and Enabled & Disabled. Enter Komfortkasse in the search field.
In the Search results, look for the Komfortkasse module and select Install.
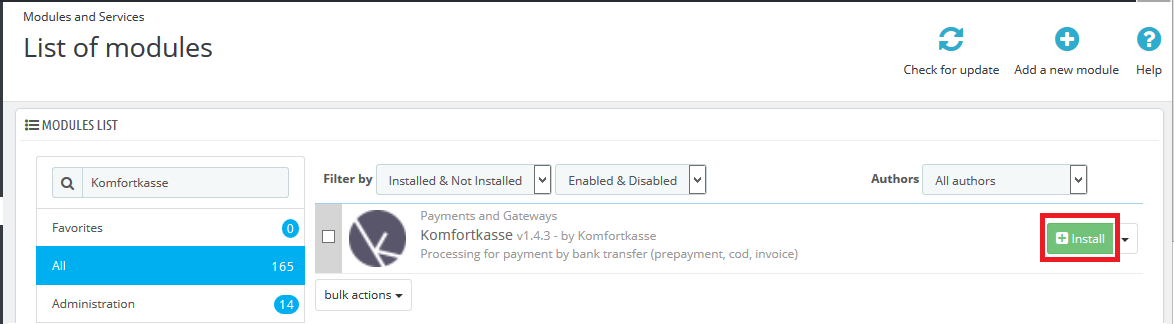
If you downloaded the module directly from Komfortkasse, confirm the warning that the module can not be verified.
You will now see a message that the module has been installed successfully and will be redirected to the Settings page.
Konfiguration des Komfortkasse Moduls für PrestaShop
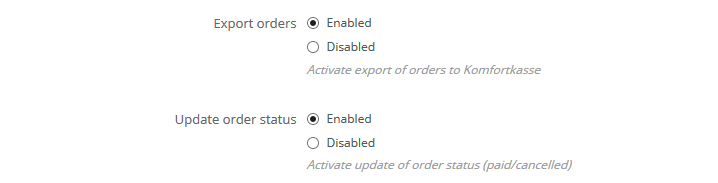
Make sure that Export orders and Update order status are enabled.
Now, choose the settings for the three payment types supported by Komfortkasse: Prepayment, Invoice and COD.
1. Prepayment settings
Select the payment method(s) that you use for prepayment. Normally, this will be Bank wire (German: Banküberweisung).

Select the order statuses that a bank wire order is considered "open". Normally, this will be Awaiting bank wire payment (German: Warten auf Zahlungseingang von Bank).

Select the order status you want to be set when payment for an order is received. Normally, this will be Payment received (German: Zahlung erhalten).

Select the order status you want to be set when the order gets cancelled because no payment is received. Normally, this will be Order cancelled (German: Bestellung storniert).

2. Invoice settings
For invoice (and COD), payment will be received after shipping. In a default PrestaShop installation, there are no order statuses that represent an order that has been shipped and afterwards paid. Therefore, we recommend to add two extra statuses: one for shipped and paid orders, and one for orders that have been shipped but have never been paid.

Now. get back to the module settings.
Select the payment method(s) that you use for invoice. In a default PrestaShop installation, no such payment method exists, you will have to install a module like this one.

Select the order statuses that a invoice order is considered "open". Normally, this will be Shipped and/or Dispatched.

Select the order status you want to be set when the payment is received. This will be one of the statuses that we created before.

Select the order status you want to be set when no payment is received. This will be the other one of the statuses that we created before. These orders might be written off or given to a debt collection agency.

3. Cash on delivery (COD) settings
For COD (and invoice), payment will be received after shipping. In a default PrestaShop installation, there are no order statuses that represent an order that has been shipped and afterwards paid. Therefore, we recommend to add two extra statuses: one for shipped and paid orders, and one for orders that have been shipped but have never been paid.
Now. get back to the module settings.
Select the payment method(s) that you use for COD. Normally, this will be Cash on delivery (German: Nachnahme).

Select the order statuses that a COD order is considered "open". Normally, this will be Shipped and/or Dispatched.

Select the order status you want to be set when the payment from the shipping company is received. This will be one of the status that we created before.

Select the order status you want to be set when no payment is received from the shipping company. This will be one of the status that we created before. These order will need manual treatment (maybe the order never got delivered, or the shipping company messed something up with the payment).

That's it! Do not change the other settings (encryption and keys). These will be set automatically upon connecting your shop.
Herstellen der Verbindung
Wenn alle Einstellungen in der Komfortkasse Magento Extension vollständig hinterlegt sind, kann der Shop in Komfortkasse eingerichtet werden.
Melden Sie sich im Komfortkasse Händlerbereich an und wählen Sie "Magento" als Shopsystem. Geben Sie die URL des Shops an und speichern Sie die Daten.
Wählen Sie dann im Aktionsmenü ≡ die Aktion Verbindung herstellen.
Vorkasse in PrestaShop aktivieren
Um Komfortkasse nutzen zu können, müssen Sie Zahlung per Vorkasse in PrestaShop aktivieren. Wenn Sie bereits Vorkasse in Ihrem Shop anbieten, können Sie diesen Schritt überspringen. Bei einer Neuinstallation von PrestaShop ist Vorkasse normalerweise standardmäßig ebenfalls bereits aktiviert.
Melden Sie sich im PrestaShop Backend an und öffnen Sie Module - Zahlung. Wählen Sie in der Liste bei Banküberweisung den Link Aktivieren (wenn die Zahlugsart noch nicht installiert ist, wählen SIe zuerst Installieren):

Sie haben nun Vorkasse in Ihrem Shop aktiviert.
Versand von Zahlungsinformationen in PrestaShop deaktivieren
Im Normalfall erhalten Ihre Kunden die Zahlungsinformationen direkt von Komfortkasse. Wenn Sie bereits Vorkasse anbieten, haben Sie Ihren Shop jetzt wahrscheinlich schon so konfiguriert, dass Ihre Kunden Ihre Bankverbindung erhalten. Diesen Versand sollten Sie nun deaktivieren (außer, wenn Zahlungsinformationen weiterhin vom Shop direkt und nicht von Komfortkasse versendet werden sollen).
Melden Sie sich im PrestaShop Backend an und öffnen Sie Module - Zahlung. Wählen Sie neben Banküberweisung den Link Einstellungen:

Hinterlegen Sie statt der Bankverbindung einen erklärenden Text, z.B. "Sie erhalten die Bankverbindung in einem weiteren E-Mail" o.ä.:

Speichern Sie die Daten mit einem Klick auf Speichern.
Hinweis für erfahrene Benutzer: Alternativ können Sie den Versand der E-Mail aus PrestaShop auch komplett deaktivieren. Öffnen Sie dazu den entsprechenden Bestellstatus (z.B. "Warten auf Zahlunsgeingang") (unter Shop-Einstellungen - Bestellungen - Status) und deaktivieren Sie die Checkbox "Sende E-Mail an Kunden, wenn sich der Status ändert".